


<blockquote><p>目前小程序已在前端占了一席之地,最近公司项目上用的就是小程序开发,由于功能及页面不是很多,所以直接原生开发,毕竟坑可能会少点,在开发过程中,小程序自带导航栏和客户的设计稿导航栏排在一起,感觉很别扭,因此要求去掉微信的自带导航栏,微信提供了这方面的api,接下来我们就实操。</p></blockquote><div class="image-package"><img src=" https://upload-imagesjianshuio/upload_images/8877503-c85b39b2671d31b7jpeg " img-data="{"format":"jpeg","size":14897,"height":141,"width":963}" class="uploaded-img" style="min-height:200px;min-width:200px;" width="auto" height="auto"/>
</div><p><span style="font-size:15px">这是小程序官方文档截图,可以看到导航栏样式支持两种,默认是带导航栏,另外一种是自定义导航栏-custom,如果使用自定义导航栏,我们可以</span></p><p><strong><span style="font-size:15px">全局配置</span></strong><span style="font-size:15px"/></p><span style="font-size:inherit">//appjson</span>
<span style="font-size:inherit">"window"</span>: {
<span style="font-size:inherit">"navigationStyle"</span>: <span style="font-size:inherit">"custom"</span>
}
<p><strong><span style="font-size:15px">单页面配置</span></strong></p><span style="font-size:inherit">//pagejson</span>
{
<span style="font-size:inherit">"navigationStyle"</span>: <span style="font-size:inherit">"custom"</span>
}
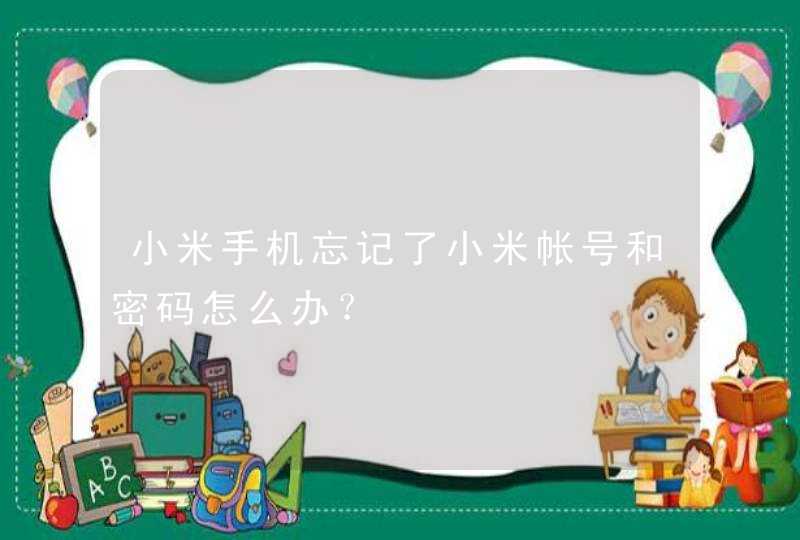
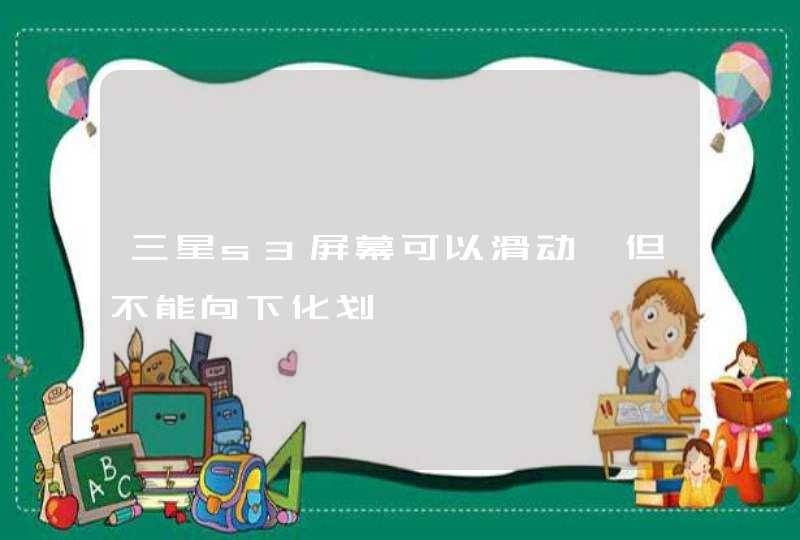
<p><strong><span style="font-size:15px">效果对比</span></strong>
</p><div class="image-package"><img src=" https://upload-imagesjianshuio/upload_images/8877503-1d120c002c6ef37cjpeg " img-data="{"format":"jpeg","size":17446,"height":352,"width":922}" class="uploaded-img" style="min-height:200px;min-width:200px;" width="auto" height="auto"/>
</div><span style="font-size:15px">能明显的看出来,自定义导航栏页面内容已经顶到屏幕顶端,除了胶囊按钮,其他都是页面可控区域。</span><span style="font-size:15px">每个手机的屏幕都不一样,各家系统的状态栏高度也不一样,因此,我们在开发页面时要考虑屏幕的适配,有刘海的,要留出刘海的距离,没有的,要把状态栏高度留出来。</span><p><strong><span style="font-size:16px">1获取导航栏高度及按钮位置</span></strong>
</p><p><span style="font-size:15px">微信提供了获取导航栏高度的Api和胶囊按钮位置的Api</span>
</p><span style="font-size:inherit">// 系统信息</span>
<span style="font-size:inherit">const</span> systemInfo = wxgetSystemInfoSync();
<span style="font-size:inherit">// 胶囊按钮位置信息</span>
<span style="font-size:inherit">const</span> menuButtonInfo = wxgetMenuButtonBoundingClientRect();
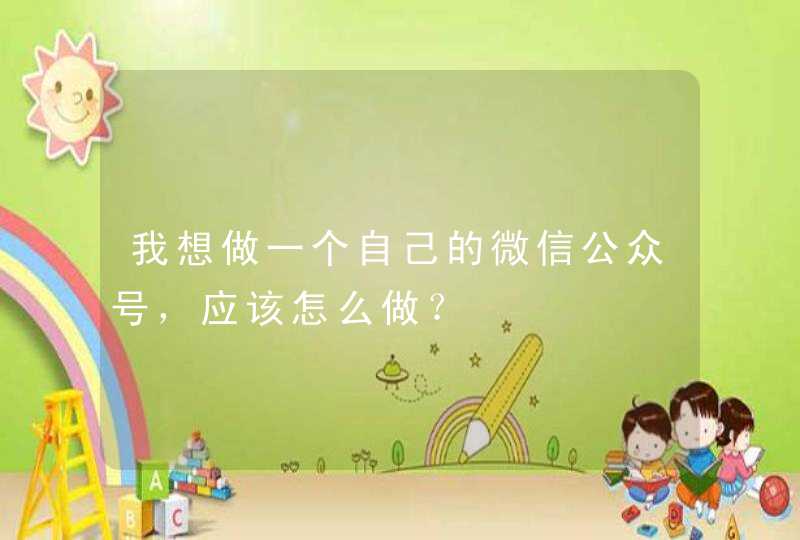
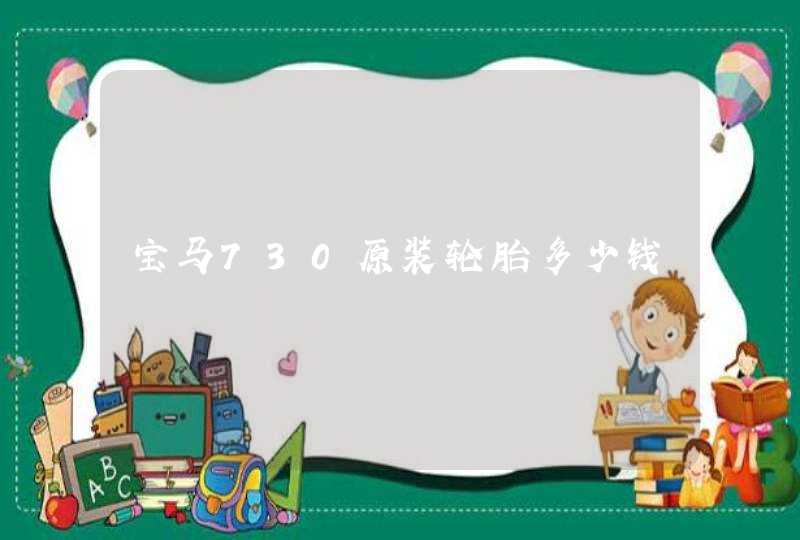
<p><span style="font-size:15px">在控制台打印出这两个Api返回结果</span></p><div class="image-package"><img src=" https://upload-imagesjianshuio/upload_images/8877503-7925dd39fb0ec47ajpeg " img-data="{"format":"jpeg","size":39744,"height":497,"width":679}" class="uploaded-img" style="min-height:200px;min-width:200px;" width="auto" height="auto"/>
</div><p><span style="font-size:15px">这里面我们只说几个我们接下来用到的参数。</span></p>statusBarHeight <span style="font-size:inherit">// 状态栏高度</span>
screenWidth <span style="font-size:inherit">// 胶囊的宽度</span>
top <span style="font-size:inherit">// 胶囊到顶部距离</span>
height <span style="font-size:inherit">// 胶囊的高度</span>
right <span style="font-size:inherit">// 胶囊距离右边的距离</span>
<p><span style="font-size:15px">通过这几个参数,我们可以计算出状态栏的高度,微信胶囊所占的高度(存在padding值,可以使元素和胶囊纵向居中)</span>
</p><p><span style="font-size:15px">首先在appjs中定义全局data-globalData</span></p>globalData: {
navBarHeight: <span style="font-size:inherit">0</span>, <span style="font-size:inherit">// 导航栏高度</span>
menuBotton: <span style="font-size:inherit">0</span>, <span style="font-size:inherit">// 胶囊距底部间距(保持底部间距一致)</span>
menuRight: <span style="font-size:inherit">0</span>, <span style="font-size:inherit">// 胶囊距右方间距(方保持左、右间距一致)</span>
menuHeight: <span style="font-size:inherit">0</span>, <span style="font-size:inherit">// 胶囊高度(自定义内容可与胶囊高度保证一致)</span>
},
<p><span style="font-size:15px">新建个方法</span>
</p>setNavBarInfo() {
<span style="font-size:inherit">// 获取系统信息</span>
const systemInfo = wxgetSystemInfoSync();
<span style="font-size:inherit">// 胶囊按钮位置信息</span>
const menuButtonInfo = wxgetMenuButtonBoundingClientRect();
<span style="font-size:inherit">// 导航栏高度 = 状态栏到胶囊的间距(胶囊距上距离-状态栏高度) 2 + 胶囊高度 + 状态栏高度</span>
<span style="font-size:inherit">this</span>globalDatanavBarHeight = (menuButtonInfotop - systemInfostatusBarHeight) <span style="font-size:inherit">2</span> + menuButtonInfoheight + systemInfostatusBarHeight;
<span style="font-size:inherit">this</span>globalDatamenuBotton = menuButtonInfotop - systemInfostatusBarHeight;
<span style="font-size:inherit">this</span>globalDatamenuRight = systemInfoscreenWidth - menuButtonInforight;
<span style="font-size:inherit">this</span>globalDatamenuHeight = menuButtonInforight;
}
<p><span style="font-size:15px">在onLaunch中调用,因为我这个项目是所有的导航都不用微信自带的,所以在appjs</span>
</p><p><span style="font-size:15px">中调用及设置data。</span></p> onLaunch() {
<span style="font-size:inherit">this</span>setNavBarInfo()
},
<p><span style="font-size:15px"/><span style="font-size:15px">到这里所需要用到的都已经存了起来,页面用法也比较简单,排除状态栏的高度,设置导航栏的高度和胶囊高度保持,用flex布局。</span>
</p><p><strong><span style="font-size:16px">2页面适配</span></strong></p><p><span style="font-size:15px">首先pagejs中定义变量</span></p><span style="font-size:inherit">var</span> app = getApp()
Page({
<span style="font-size:inherit">/
页面的初始数据
/</span>
data: {
navBarHeight: appglobalDatanavBarHeight, <span style="font-size:inherit">//导航栏高度</span>
menuBotton: appglobalDatamenuBotton, <span style="font-size:inherit">//导航栏距离顶部距离</span>
menuRight: appglobalDatamenuRight, <span style="font-size:inherit">//导航栏距离右侧距离</span>
menuHeight: appglobalDatamenuHeight, <span style="font-size:inherit">//导航栏高度</span>
}
})
<p><span style="font-size:15px">页面使用</span>
</p><span style="font-size:inherit"><<span style="font-size:inherit">view</span> <span style="font-size:inherit">class</span>=<span style="font-size:inherit">"nav"</span> <span style="font-size:inherit">style</span>=<span style="font-size:inherit">"height:{{navBarHeight}}px;"</span>></span>
<span style="font-size:inherit"><<span style="font-size:inherit">view</span> <span style="font-size:inherit">class</span>=<span style="font-size:inherit">"nav-main"</span>></span>
<span style="font-size:inherit"></span>
<span style="font-size:inherit"><<span style="font-size:inherit">view</span>
<span style="font-size:inherit">class</span>=<span style="font-size:inherit">"capsule-box"</span> <span style="font-size:inherit">style</span>=<span style="font-size:inherit">"style="</span><span style="font-size:inherit">height:</span>{{menuHeight+menuBotton 2}}<span style="font-size:inherit">px</span>; <span style="font-size:inherit">min-height:</span>{{menuHeight}}<span style="font-size:inherit">px</span>; <span style="font-size:inherit">line-height:</span>{{menuHeight}}<span style="font-size:inherit">px</span>; <span style="font-size:inherit">bottom:0px</span>;<span style="font-size:inherit">padding:0</span> {{menuRight}}<span style="font-size:inherit">px</span>;"></span>
<span style="font-size:inherit"></span>
<span style="font-size:inherit"><<span style="font-size:inherit">slot</span>></span><span style="font-size:inherit"></<span style="font-size:inherit">slot</span>></span>
<span style="font-size:inherit"></<span style="font-size:inherit">view</span>></span>
<span style="font-size:inherit"></<span style="font-size:inherit">view</span>></span>
<span style="font-size:inherit"></<span style="font-size:inherit">view</span>></span>
<p><span style="font-size:15px">wxss</span>
</p><span style="font-size:inherit">/ 公共导航 /</span>
<span style="font-size:inherit">nav</span> {
<span style="font-size:inherit">position</span>: fixed;
<span style="font-size:inherit">top</span>: <span style="font-size:inherit">0</span>;
<span style="font-size:inherit">left</span>: <span style="font-size:inherit">0</span>;
<span style="font-size:inherit">box-sizing</span>: border-box;
<span style="font-size:inherit">width</span>: <span style="font-size:inherit">100vw</span>;
<span style="font-size:inherit">z-index</span>: <span style="font-size:inherit">1000</span>;
}
<span style="font-size:inherit">nav-main</span> {
<span style="font-size:inherit">width</span>: <span style="font-size:inherit">100%</span>;
<span style="font-size:inherit">height</span>: <span style="font-size:inherit">100%</span>;
<span style="font-size:inherit">box-sizing</span>: border-box;
<span style="font-size:inherit">position</span>: relative;
}
<span style="font-size:inherit">nav</span> <span style="font-size:inherit">capsule-box</span> {
<span style="font-size:inherit">position</span>: absolute;
<span style="font-size:inherit">box-sizing</span>: border-box;
<span style="font-size:inherit">width</span>: <span style="font-size:inherit">100%</span>;
<span style="font-size:inherit">display</span>: flex;
<span style="font-size:inherit">align-items</span>: center;
}
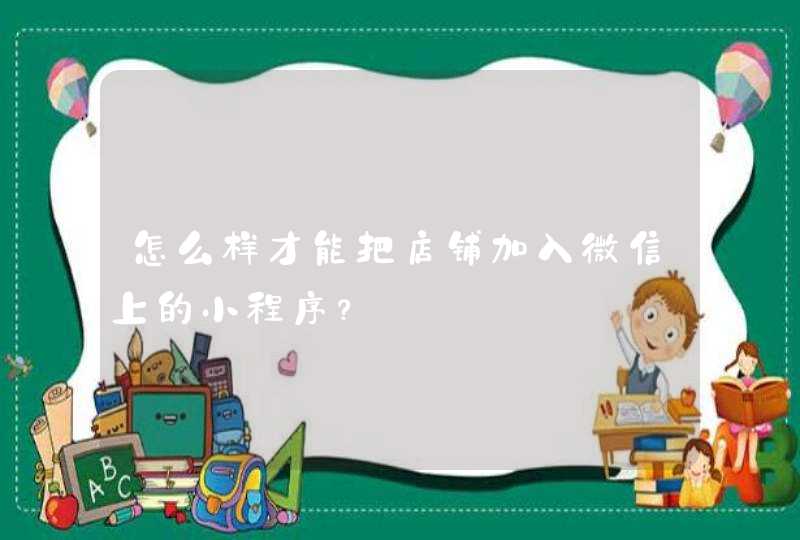
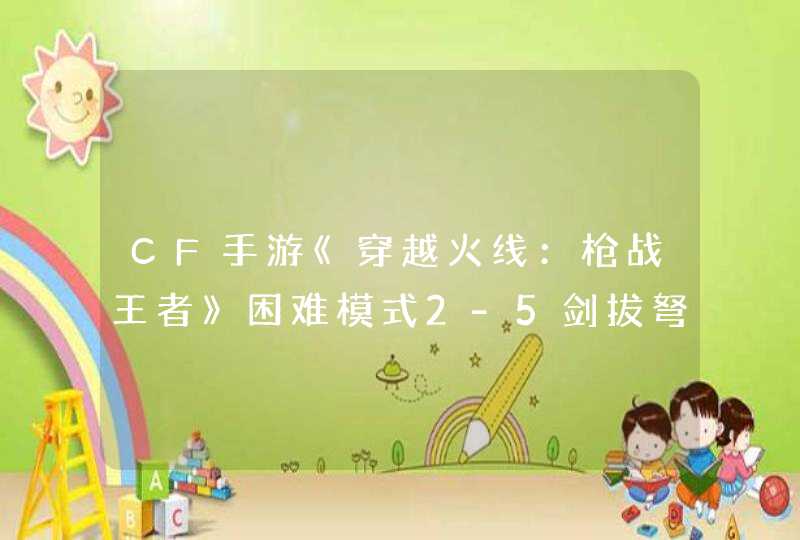
<p><span style="font-size:15px">最终效果</span></p><div class="image-package"><img src=" https://upload-imagesjianshuio/upload_images/8877503-ef017724a144e58cjpeg " img-data="{"format":"jpeg","size":4933,"height":105,"width":349}" class="uploaded-img" style="min-height:200px;min-width:200px;" width="auto" height="auto"/>
</div><p><span style="font-size:15px"/>
</p><p><span style="font-size:15px">此种适配方案适应所有手机,应该说是最优的选择。</span></p>
fight:function(e){
that = this;
thatsetData({
buttondisabled: true,
loading: true
}); //<--这里是分号不是逗号
setTimeout(function(){
thatsetData({
buttondisplay: 'none',
playerdisplay: 'block'
}) //这里的错误不太好描述,自己看了
}, 9000);
}
这个问题,如果条件允许,最好在后台程序中解决,在后台读取出路径数据后,立刻就分割为数组,然后把所有数据按json格式返回给小程序,小程序再把它放入page的data中,这样小程序无须大的改动就能显示了。
如果这个办法行不通,也可以在小程序获得后台返回的json数据后,先把其中的路径数据(即用:分隔的多个路径的字符串)用split分割为数组,再放入page的data中,这样小程序的wxml文件也不需要大改就能显示多个了。
如果实在懒得很,后台返回的数据一股脑的直接放到page的data中,那么还有最后的一种解决办法,就是在wxml文件中通过小程序自身的wxs语言实时分割路径字符串,比如(假定字段名为image):
<wxs module="fun"> moduleexports = { imgPathSplit: function(s) { if (s) return ssplit(":"); } }</wxs>
然后在需要循环显示的地方加入代码(只是示例):
<image wx:for="{{funimgPathSplit(itemimage)}}" wx:key="this" mode="aspectFill" src="{{item}}"></image>
这样,在小程序渲染页面时就会实时对路径字符串进行分割,再循环显示出来。
微信小程序中的rich-text可以接收转移html标签
字体的样式处理 可以通过 给rich-text添加类名设置字体样式
的样式(自适应)
获取的html标签字符串replace(/<img/g, '<img style="max-width:100%;height:auto;display:block;margin:10px 0;"')
用thissetData({ shuju1 : shuju2 }),
shuju1:你自己命名的名字,
shuju2:调用接口后返回的数据,
然后你页面就可以用{{shuju1}},这样来获取了。
微信(wechat)是腾讯公司于2011年1月21日推出的一个为智能终端提供即时通讯服务的免费应用程序,微信支持跨通信运营商、跨操作系统平台通过网络快速发送免费(需消耗少量网络流量)语音短信、视频、和文字,同时,也可以使用通过共享流媒体内容的资料和基于位置的社交插件“摇一摇”、“漂流瓶”、“朋友圈”、”公众平台“、”语音记事本“等服务插件。
微信提供公众平台、朋友圈、消息推送等功能,用户可以通过“摇一摇”、“搜索号码”、“附近的人”、扫二维码方式添加好友和关注公众平台,同时微信将内容分享给好友以及将用户看到的精彩内容分享到微信朋友圈。
截至2013年11月注册用户量已经突破6亿,是亚洲地区最大用户群体的移动即时通讯软件。截止2016年12月微信的月活跃用户数已达889亿。
微信由深圳腾讯控股有限公司 (Tencent Holdings Limited)于2010年10月筹划启动,由腾讯广州研发中心产品团队打造 。该团队经理张小龙所带领的团队曾成功开发过Foxmail、QQ邮箱等互联网项目。腾讯公司总裁马化腾在产品策划的邮件中确定了这款产品的名称叫做“微信”。
2011年1月21日,微信发布针对iPhone用户的10测试版。该版本支持通过QQ号来导入现有的联系人资料,但仅有即时通讯、分享照片和更换头像等简单功能。
在随后11、12和13三个测试版中,微信逐渐增加了对手机通讯录的读取、与腾讯微博私信的互通以及多人会话功能的支持,截至2011年4月底,腾讯微信获得了四五百万注册用户。
通过改变数组长度动态增删组件
<block wx:for="{{数组}}">
组件
</block>
1
2
3
1
2
3
2、点击添加按钮,增加数组的成员,组件相应增加
点击删除按钮,减少数组的成员,组件相应删除
二、示例
wxml:
<view>
<button bindtap='onTapAdd'>添加input组件</button>
<button bindtap='onTapDel'>删除Input组件</button>
<block wx:for="{{obj}}" wx:key>
<input value="{{item}}"></input>
</block>
</view>
1
2
3
4
5
6
7
1
2
3
4
5
6
7
js:
data: {
obj:[]
},
/增加组件 /
onTapAdd:function(e){
var temp=thisdataobj;
temppush(thisdataobjlength);
thissetData({
obj:temp
})
},
/ 删除最后一个组件,也可以修改删除指定组件/
onTapDel:function(e){
var temp = thisdataobj;
temppop(thisdataobjlength);
thissetData({
obj: temp
})
},
微信小程序的文本,要具有长按复制功能,必须满足两个条件:
1小程序文本要在 标签内;
2小程序 标签要有 selectable 属性。
例如:
<text selectable='true'>文本</text>
1
1
下面一个例子是,解决小程序富文本组件 WxParse 不能长按选择的问题。在 wxParsewxml 中修改:
意思是在wxParse源码文件下 的wxParse文件下的wxParsewxml
-为要修改的代码行
+为修改后的代码行
<template name="WxEmojiView">
<view class="WxEmojiView wxParse-inline" style="{{itemstyleStr}}">
<block wx:for="{{itemtextArray}}" wx:key="">
- <block class="{{itemtext == '\\n' 'wxParse-hide':''}}" wx:if="{{itemnode == 'text'}}">{{itemtext}}</block>
+ <block class="{{itemtext == '\\n' 'wxParse-hide':''}}" wx:if="{{itemnode == 'text'}}">
+ <text selectable="true">{{itemtext}}</text>
+ </block>
<block wx:elif="{{itemnode == 'element'}}">
<image class="wxEmoji" src="{{itembaseSrc}}{{itemtext}}" />
</block>
</view>
</template>
1
2
3
4
5
6
7
8
9
10
11
12
13
1
2
3
4
5
6
7
8
9
10
11
12
13
微信小程序selectable='true'无复制效果解决
<text selectable></text>或<text selectable='{{true}}'>