


![CSS 点击按钮以后修改DIV的高度,代码怎么写?[有代码]](/aiimages/CSS+%E7%82%B9%E5%87%BB%E6%8C%89%E9%92%AE%E4%BB%A5%E5%90%8E%E4%BF%AE%E6%94%B9DIV%E7%9A%84%E9%AB%98%E5%BA%A6%EF%BC%8C%E4%BB%A3%E7%A0%81%E6%80%8E%E4%B9%88%E5%86%99%EF%BC%9F%5B%E6%9C%89%E4%BB%A3%E7%A0%81%5D.png)


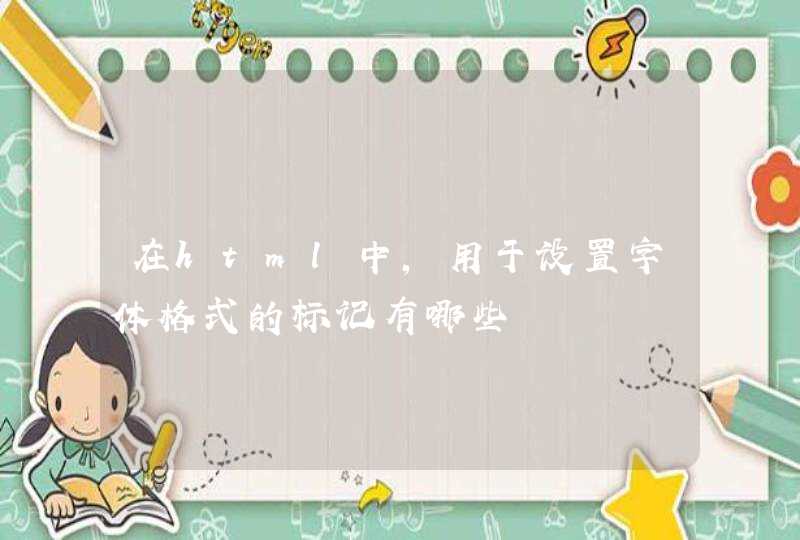
在桌面新建一个文本文档,并命名为“三角形”,打开新建的文本文档,把html里的doctype、head、body等框架搭好。
【注意】可以在写完之后再重新重命名为.html文件。
2
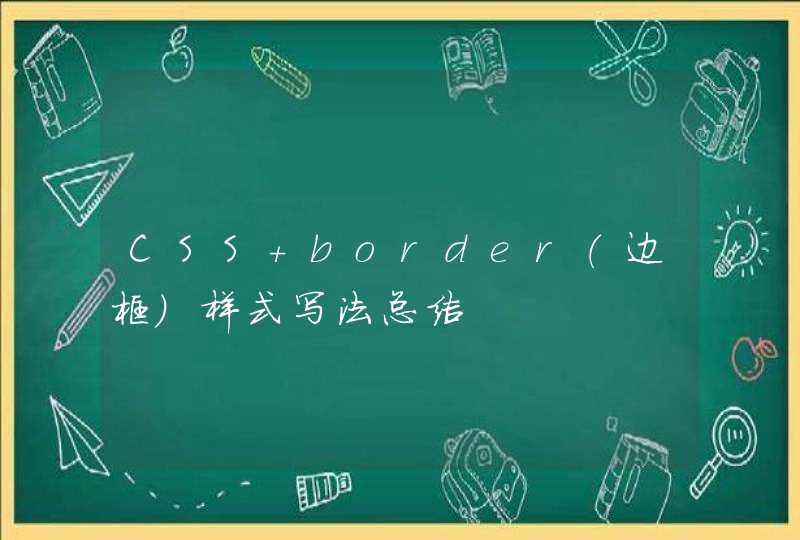
【创建div并用border属性控制】
布局div,并命名id="tri",用CSS来控制div,在style里面,使用border属性对div进行控制,
#tri{
width: 0px
height: 0px
border-top: 400px solid red
border-right: 400px solid blue
border-bottom: 400px solid green
border-left: 400px solid yellow
}
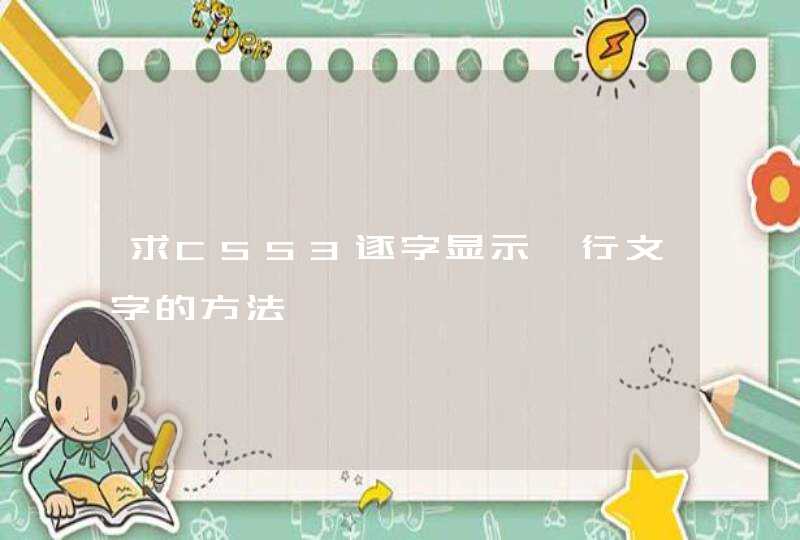
【注意】div的长宽设为0,border为边框,会看到如下四个三角状的图形。
3
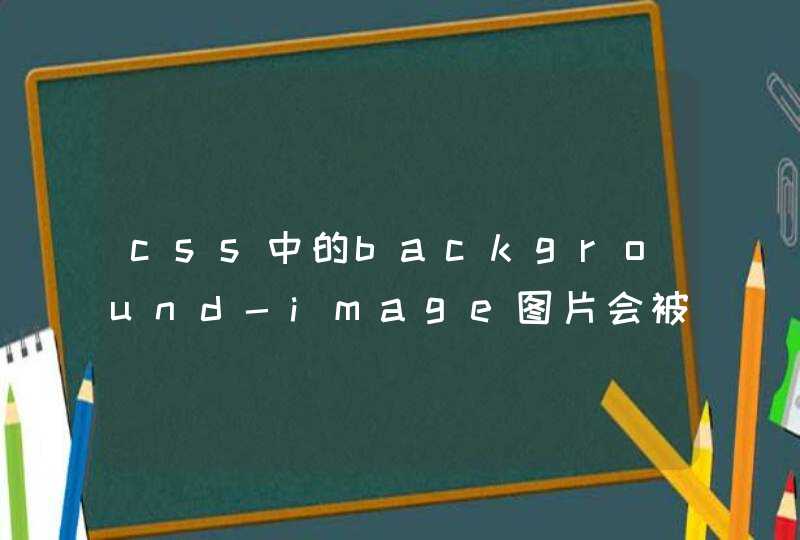
【修改并选择自己想要的三角形】
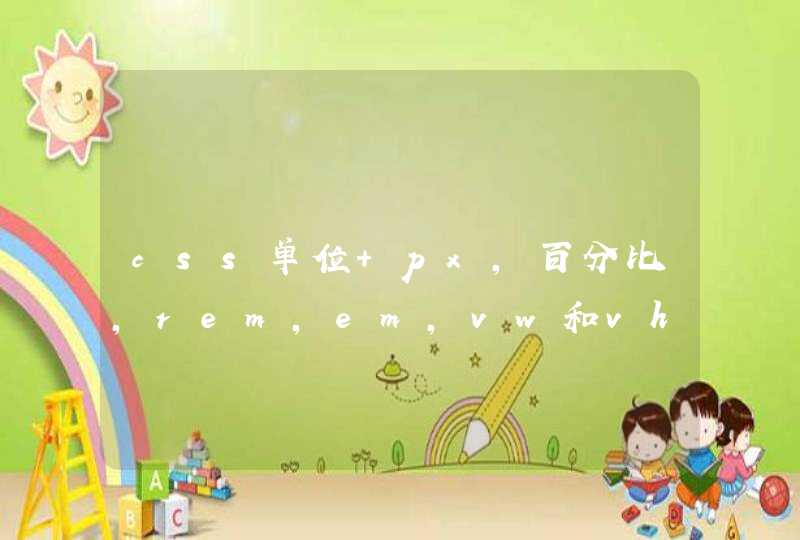
上述代码画的还不是三角形,但是是四个三角,只要将border周边的颜色变成白色就可以了,例如除了border-bottom: 100px solid green其余全变为white,就会看到如下效果,当然你也可以根据自己需要来调整。
此外可以将border-top的像素设为0;其余两边也调小一点并且颜色设为白色,就会只看到底下的一个三角形了。
【注意】根据自己实际来挑选自己想要达到的效果。图一图二效果不同,就是border设定不同的原因。
4
代码如下仅做参考:
<!DOCTYPE HTML PUBLIC "-//W3C//DTD HTML 4.01 Transitional//EN" "http://www.w3.org/TR/html4/loose.dtd">
<html>
<head>
<meta http-equiv="Content-Type" content="text/htmlcharset=UTF-8">
<title>三角练习</title>
<style>
#tri{
width: 0px
height: 0px
border-top: 0px solid white
border-right: 100px solid white
border-bottom: 400px solid green
border-left: 100px solid white
}
</style>
</head>
<body>
<div id="tri"></div>
</body>
</html>
END
画圣诞树
【画两个三角】
用上面三角形的基础,先画出两个大小不同三角形。
#tri1{
width: 0px
height: 0px
border-top: 100px solid white
border-right: 100px solid white
border-bottom: 100px solid green
border-left: 100px solid white
}
#tri2{
width: 0px
height: 0px
border-top: 200px solid white
border-right: 200px solid white
border-bottom: 200px solid green
border-left: 200px solid white
}
【利用浮动以及margin调到合适位置】
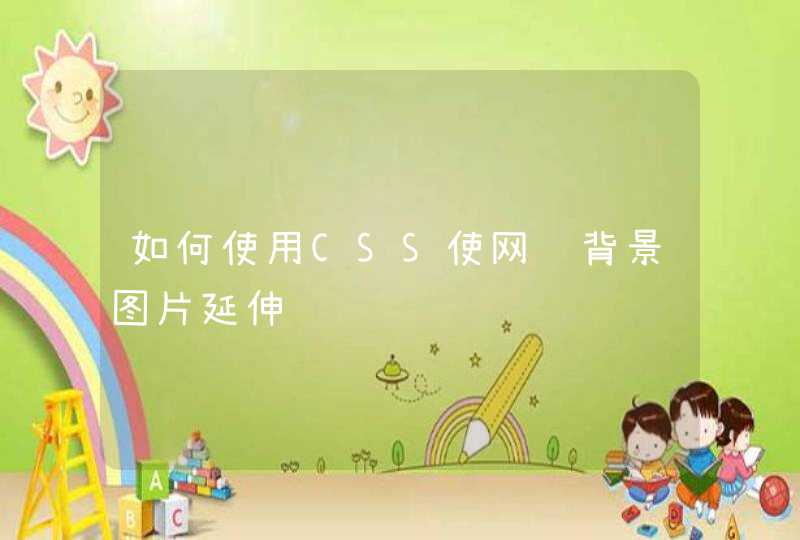
将第一个小三角形浮动起来,这样就覆盖到第2个上面,然后利用margin值调动位置,最终显示出圣诞树的上面内容,代码如下,图如下。
#tri1{
width: 0px
height: 0px
border-top: 100px solid white
border-right: 100px solid white
border-bottom: 100px solid green
border-left: 100px solid white
float: left
margin-left: 100px
}
#tri2{
width: 0px
height: 0px
border-top: 200px solid white
border-right: 200px solid white
border-bottom: 200px solid green
border-left: 200px solid white
}
【画树干】
再加入一个div名字为footer,控制其大小形状与颜色,并用margin调整期位置。
#footer{
width: 100px
height: 200px
background: gray
margin-left: 150px
}
最终,经过调整得到一课圣诞树。如下图所示
完整代码如下,仅做参考
<!DOCTYPE HTML PUBLIC "-//W3C//DTD HTML 4.01 Transitional//EN" "http://www.w3.org/TR/html4/loose.dtd">
<html lang="en">
<head>
<meta http-equiv="Content-Type" content="text/htmlcharset=UTF-8">
<title>圣诞树练习</title>
<style>
#header{
width: 0px
height: 0px
border-top: 100px solid white
border-right: 100px solid white
border-bottom: 100px solid green
border-left: 100px solid white
float: left
margin-left: 100px
}
#main{
width: 0px
height: 0px
border-top: 200px solid white
border-right: 200px solid white
border-bottom: 200px solid green
border-left: 200px solid white
}
#footer{
width: 100px
height: 200px
background: gray
margin-left: 150px
}
</style>
</head>
<body>
<div id="header"></div>
<div id="main"></div>
<div id="footer"></div>
</body>
</html>
<!doctype html><html>
<head>
<meta charset="utf-8">
<title>无标题文档</title>
<style>
.a{
border-bottom:1px solid #aaa
height:50px
width:100px
position:relative
overflow:hidden
}
.b{
position:absolute
display:block
top:0px
left:0px
width:100px
height:50px
}
.b i,.b em{
position:absolute
left:0px
bottom:0px
border-color:transparent
border-color:rgba(255,255,255,0)
border-style:solid
border-width:0 50px 50px 50px
}
.b i{
border-bottom-color:#aaa
}
.b em{
border-bottom-color:#FFF
bottom:-1px
}
.text{
position:absolute
bottom:10px
background:none
border:none
outline:none
text-align:center
width:100%
}
</style>
</head>
<body>
<div class = "a">
<span class = "b">
<i></i>
<em></em>
</span>
</div>
</body>
</html>
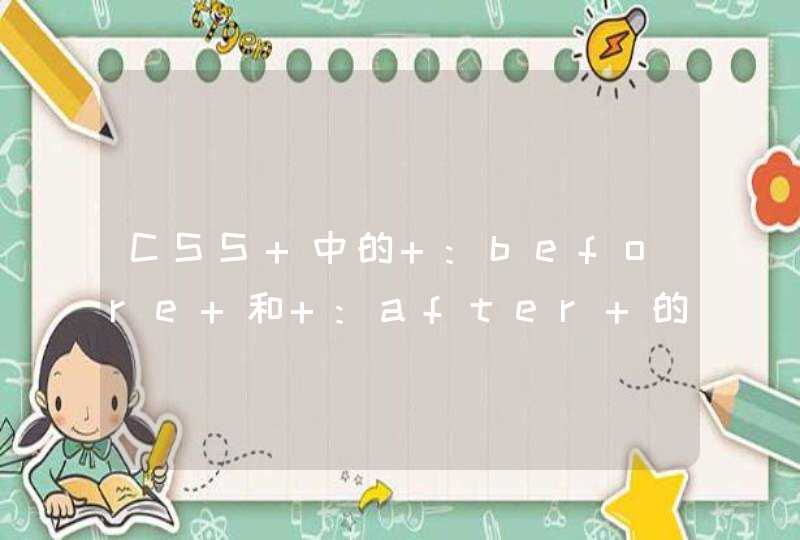
当div宽度为0,高度为0的时候,只设置border的大小和四边不同颜色可看到下图,只保留一边的颜色,另外三边的颜色设置为transparent可得到一个方向的三角形。因此,可延伸出设置一边的border的颜色,相邻两边的border设置为transparent可得到一个方向的三角形。
border的大小的值为三角形底边上的高,三角形的底为相邻两边的border的高的和,如下图所示的红色锐角三角形
若想实现直角三角形的效果,如下图所示直角在左上的三角形,按原理可设置上border和左border的颜色,另外两条边的颜色为transparent,此样式可简写为只设置上border的颜色,另一条相邻的右border为transparent
你也许会遇到要画个奇怪三角形的时候,只要参考锐角三角形的方式,找到三角形底边和高,计算出三角形高和把相邻两条边的高相加作为底部,你可以画出各种各样的三角形,如果再加上角度旋转的css,你便啥三角形都能画!
此类三角形解决思路通常使用两个不同颜色的三角形做颜色叠加,比如做如上图所示的边框为1px的红色边框白色底三角形,就先画一个红色三角形,再画一个尺寸少2px的白色底三角形,然后设置两个三角形的position将三角形重叠,这里使用伪元素实现
1、向上正箭头
2、向下正箭头
3、向左正箭头
4、向右正箭头
5、向左上箭头
6、向右上箭头
7、向左下箭头
8、向右下箭头